Wednesday, October 6, 2010

Daring Bakers, September: Decorating Sugar Cookies

Late, oh so late, because I hadn't taken the photos off my camera, and I forgot where it was, only just found it. The September 2010 Daring Bakers’ challenge was hosted by Mandy of “What the Fruitcake?!” Mandy challenged everyone to make Decorated Sugar Cookies based on recipes from Peggy Porschen and The Joy of Baking. I did it, it was fun.

Basic Sugar Cookies:
Approximately 50x 7cm biscuits.


200g Unsalted Butter, at room temperature
3 cups + 3 Tbsp All Purpose / Plain Flour
1 cup Caster Sugar / Superfine Sugar
1 Large Egg, lightly beaten
1 tsp Vanilla Extract / Or seeds from 1 vanilla bean
 
Cream together the butter, sugar and any flavourings you’re using. Beat until just becoming
creamy.  Beat in the egg until well combined, make sure to scrape down the sides of the bowl.
Add the sifted flour and mix on low until a non sticky dough forms. Knead into a ball and divide into 2 or 3 pieces. Roll out each portion between parchment paper to a thickness of about 5mm/1/5 inch (0.2 inch) Refrigerate for a minimum of 30mins. Once chilled, peel off parchment and place dough on a lightly floured surface. Cut out shapes with cookie cutters or a sharp knife. Arrange shapes on parchment lined baking sheets and refrigerate for another 30mins to an hour. Re-roll scraps and follow the above process until all scraps are used up.

Preheat oven to 180°C (160°C Fan Assisted). Bake until golden around the edges, about 8-15mins depending on the size of the cookies.

Royal Icing:
2½ - 3 cups Icing Sugar, unsifted
2 Large Egg Whites
10ml / 2 tsp Lemon Juice


Directions
Beat egg whites with lemon juice until combined.  Sift the icing sugar to remove lumps and add it to the egg whites. Beat on low until combined and smooth. Use immediately or keep in an airtight container.


I bought some Wilton colourings for the icing, which included a black (impressive) and they turned out to be awesome (more impressive).  I might try and do more decorating with them soon, this was a lot of fun.

Thursday, September 16, 2010

Daring Cooks September Challenge

The September 2010 Daring Cooks’ challenge was hosted by John of Eat4Fun. John chose to challenge The Daring Cooks to learn about food preservation, mainly in the form of canning and freezing. He challenged everyone to make a recipe and preserve it. John’s source for food preservation information was from The National Center for Home Food Preservation.

John provided us with a recipe for apple butter, madly (in my view) using some sugar substitute rather than sugar.  I ignored that, using sugar, but was intrigued by apple butter and followed through on it.  Turns out that it is tremendously easy. I bought a 2kg bag of apples, cored them, didn't bother peeling them, into a pot with a half cup of sugar and a good squeeze of lime juice, and simply cooked them down through being stewed apples until they were falling to pieces.  Then I took a stick blender and transformed the whole into apple sauce.  This I kept cooking for maybe 2 hours on a low temperature, until the liquid content had reduced to practically nothing, and the remaining butter held its shape when scooped out onto a plate.  Delicious, and oh so easy.  Oh, and then i froze some, to fulfill the challenge requirements.

The apple butter
Apple butter bagged and ready to freeze

Of course, with all this delicious apple butter on hand, I needed to do something more than just eat it, good as that was.  So I decided to finally get around to using the filo pastry I had sitting in the fridge.  I made... things.  Not entirely sure what they are called, I imagine it is Turkish or pseudo-Turkish in origin.  A baked semolina custard, cut into rectangles, topped in apple butter, wrapped in filo and baked.  Looks like this:


Semolina Apple Butter Pastry


So, to make the semolina custard, I took a third of a cup of semolina and 2 cups of milk, quarter cup of sugar.  Made that into semolina by heating the milk to just below boiling, whisking in semolina and sugar, and stirring it until thick.  Took it off the heat, mixed through 2 eggs, a bit more sugar, and 30gm of butter, and transferred it to an oven dish.  Baked the resulting slurry until it firmed (about 80 minutes at 180c), and took it out to cool.

Having cooled, i cut it into fingerish sized rectangles.  Each rectangle I placed on a butter brushed sheet of filo, topped with a spoon of apple butter, and then rolled into a tube shape. (Fold each short edge over the centre, roll up along the long axis of the pastry sheet).  Brushed the remaining with butter and baked until golden.

Another baked alaska photo...

Because I heard complaints I hadn't put an image of the whole up.

Sunday, August 29, 2010

Daring Bakers August

The August 2010 Daring Bakers’ challenge was hosted by Elissa of 17 and Baking. For the first time, The Daring Bakers partnered with Sugar High Fridays for a co-event and Elissa was the gracious hostess of both. Using the theme of beurre noisette, or browned butter, Elissa chose to challenge Daring Bakers to make a pound cake to be used in either a Baked Alaska or in Ice Cream Petit Fours. The sources for Elissa’s challenge were Gourmet magazine and David Lebovitz’s “The Perfect Scoop”.

I went the baked alaska route.  As I am still operating with a minimal kitchen since the move, I tweaked things for size, and made a parfait in place of the icecream.

The standard pound cake recipe follows, I made a 1 egg version and mini alaska's:

Brown Butter Pound Cake
275g unsalted butter
2 cups flour
1 teaspoon  baking powder
1/2 teaspoon  salt
1/2 cup (110g) packed light brown sugar
1/3 (75g) cup granulated sugar
4 large eggs
1/2 teaspoon pure vanilla extract

1. Preheat the oven to 160°C and put a rack in the center. Butter and flour a 9”x9” (23cmx23cm) square pan.
2. Place the butter in a 10” (25cm) skillet over medium heat. Brown the butter until the milk solids are a dark chocolate brown and the butter smells nutty. (Don’t take your eyes off the butter in case it burns.) Pour into a shallow bowl and chill in the freezer until just congealed, 15-30 minutes.
3. Whisk together cake flour, baking powder, and salt.
4. Beat the brown butter, light brown sugar, and granulated sugar in an electric mixer until light and fluffy, about 2 minutes. Beat in the eggs one at a time, mixing well, and then the vanilla extract.
5. Stir in the flour mixture at low speed until just combined.
6. Scrape the batter into the greased and floured 9”x9” (23cmx23cm) square pan. Smooth the top with a rubber spatula and rap the pan on the counter. Bake until golden brown on top and when a toothpick inserted into the center comes out clean, about 25 minutes.
7. Cool in the pan 10 minutes. Run a knife along the edge and invert right-side-up onto a cooling rack to cool completely.


Of course, as I was doing everything in miniature, I had to fiddle with the temperatures.  But it worked out.

I incorporated a chocolate parfait I had prepared for a previous dinner into the mix.  Parfait turns out to be incredibly easy and nicer than any icecream i have ever succeeded in making without an icecream maker.  Make up a simple syrup (equal parts water and sugar) and boil for 3 mins, then dissolve 200gm or chocolate in the syrup.  Let it cool a bit, then whisk this mix through 4 egg yolks.  Add 300mL whipped cream (300 pre-whipping mLs), stir to combine, add a shot or two of your favourite liqueur, and some slivered almonds.  Freeze.

Meringue follows from parfait, you whisk the egg whites reserved from above with caster sugar until glossy and peaking.

To assemble, cut a round from the cake, add a scoop of parfait, spread meringue (uncooked, as yet) over, and freeze for a long while (few hours, or overnight). 

When you are ready to eat, chuck the frozen treat in an extremely hot oven for a couple minutes, and/or torch the outside with a kitchen blowtorch.

Sunday, August 8, 2010

Chocolate mousse

A nice chocolate mousse, on a cream base, mixed through with brandy soaked, partially reconstituted cranberries.

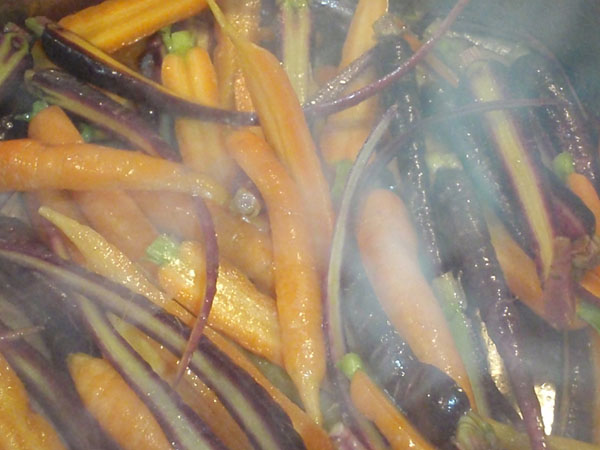
Hierloom carrots, portobello mushrooms in pastry & rocket

This was a show put on for friends with whom we were staying.  Heirloom carrots sliced lengthways and sauteed in butter.  Rocket salad.  Puff pastry wrapped portobello mushrooms.

Carrots and rocket were easy.

The mushrooms I cooked in (vegetarian) beef stock first, then sliced in half.  I spread some nice soft shadows of blue cheese on the pastry, layered the mushrooms on top, then wrapped them up.

Friday, July 30, 2010

Moving House

Have been in flux for the past while, at this stage I have zero kitchen stuff, hoping to remedy that this coming weekend by way of a trip to Ikea. Back after that. At least I now have internet at home.

Saturday, July 17, 2010

Chilli Jam

Sometimes, the hot food you find places just isn't hot enough. hen that occurs, what you need is homemade chilli jam. It is surprisingly easy. A half cup of water, some sugar, half a finely sliced red onion, half a dozen cherry tomatoes, and a bunch of the hottest chillies you can find. Chucked in a pot and cooked until jamlike. Lasts ages, tastes great.

Thursday, July 15, 2010

More from Tasmania: Smolt Restaurant.

Things to do: Stop shifting houses, stop going to conferences, start finding time to post my backlog of stuff up here.

Beginning with the second wonderful restaurant we visited on our weekend in Tasmania, Smolt.

We were perhaps a little worried about following up the absolutely marvellous lunch we had at the Source with another upmarket dinner, as we didn't want to go away disappointed.  We were sensible enough to wait a day between the two, but it turned out we had nothing to fear, as Smolt delivered some fantastic food, with friendly service in a nice atmosphere.


M started with half a dozen oysters, while I had a soup from the specials board, with beans and pork and delicious all wrapped up in a wonderful bowl and served with nice crusty bread.  The oysters were fresh as you can imagine, and we both enjoyed these courses.


For the main course, I couldn't go past the venison, while M took up the challenge of a lamb ragout with home made tagliatelle.


Did I mention that they do marvelous side dishes as well? This one was spiced deep fried cauliflower.

July Daring Cooks Challenge

The July 2010 Daring Cooks’ Challenge was hosted by Margie of More Please and Natashya of Living in the Kitchen with Puppies. They chose to challenge Daring Cooks to make their own nut butter from scratch, and use the nut butter in a recipe. Their sources include Better with Nut Butter by Cooking Light Magazine, Asian Noodles by Nina Simonds, and Food Network online.

I'm currently surrounded by vegetarians, and as such was not about to put any meat in the curry I made.  I do, however, have a soft spot for almonds, so I blended a decent amount of them (that is, the amount that fit in the processor) until the collapsed into butter.  They needed a little oil to help them along, I imagine partly to do with the processor being an attachment to a relatively weak stick blender, and partly to do with almonds being less oily than some other nuts. When done (I got bored), it looked like this:


This would be tasty, but everything is tastier as a curry.  So I went for a tomato based one, with mushrooms and eggplant providing the substance.  One medium sized eggplant, 2 brown onions, 2 cans of diced tomatoes, a couple of dozen mushrooms, some garlic, garam masala, chilli powder and flakes, a little turmeric, salt and pepper.  Curry, of course, is easy.  You brown off the onion and garlic, add the spices (and a dash of stock here, in my case), then the mushrooms and eggplants, cook until beginning to soften, add tomatoes and simmer on low until the rice is cooked.  Then you eat it.

Tasty

Tuesday, June 22, 2010

Lunch at The Source, Moorilla.

We took a long  weekend off in Hobart.  Well, we intended to take a weekend off, but I spent most of it doing a job application, as it turned out.  (A successful job application, yay.)  So instead of spending the days relaxing, I spent some part of the days relaxing, other parts working, and in between, got in a couple of very nice meals.  The first of these was a leisurely Friday afternoon lunch at The Source, which is the restaurant at Moorilla Winery.

We took a ferry to get there, and they offered us a wonderful deal, a two course set lunch with our tickets for not much money.  We of course said yes, as the set menu options looked amazing, and we figured we could always branch out if it took our fancy.

The ride out was nice, a pleasant cruise with some colourful local commentary about the good old days of Hobart.  Upon disembarking at the pier, we were met by a lovely staff member in a golf cart, who drove us to the door of the restaurant.  Such service.  We began with some wine (and beer) tasting.  The wines are excellent, although I think both of us preferred the cheaper of the two available Pinot Noirs, a 'Praxis' Pinot Noir.  Good wine.  We were paritcularly keen, though, to try the beers, and they didn't disappoint at all.  While I am a little jaded on both pilsener and IPA, the Moorilla versions were tasty.  The real treats, though, were the Hefeweisen, the Dark ale, and the Stout (this last is only, I am told, on tap, but apparently there is one at Beer Deluxe in Melbourne, well worth getting your hands on a glass of).

That done, we moved to the restaurant for our food.  We were already comfortably impressed by the service and the style of the place, and the restaurant did not disappoint.  Ushered kindly to a pleasant table overlooking the harbour, we began with Goats cheese gnocchi for myself ("Goats Cheese Gnocchi, Jeruslaem Artichoke, Hazelnut"), and a beetroot tart ("Pickled Beetroot tart, Celery Caviar, Lemon Thyme, Creme Fraiche) for M.


The Jerusalem artichoke, both in pureed form and the crispy roasted chunk of it on the right of the photo, was amazing, and the hazelnuts added a nice crunch and textural change to the airy, delicious gnocchi.  The standout part of the beetroot tart was, for me, the celery caviar, and odd texture, but I found them endearing.  Both dishes were delicious.  For the main course, I went for a Cape Grim Angus steak, while M. had the line caught fish of the day with "truffled macaroni, fois gras emulsion and jus."

Again, the food was delicious, my steak was wonderfully rare, as ordered, and while the fish doesn't photograph perfectly (probably my fault more than anything else), it tasted incredible.  So much so, that we decided to order a dessert.  In addition to a coffee (good), we had a handmade chocolate each, the jersey caramel being particularly delicious, and we were drawn to a fascinating sounding dessert on the menu, "Chocolate, Olive Oil, Salt."  Upon asking what exactly this meant, we were told that it was exactly what it said on the tin.  This turned out to be true, but not at all in a bad way.  Pink flakes of Murray River salt on a soft, ganache like chocolate, drizzled with a light and fruity olive oil, and served with crisp bread (which we ate some of, and moved the rest of, before remembering to take a photo of this).  Would definitely get this again, and encourage others to do the same.  Oh, and the glass with the sugar cubes in it made for a nice photo, so that is included here too.


Highly recommend the restaurant and the Winery, excellent food all round, and a wonderful location.  Not crazy prices either.  Website is http://moorilla.com.au/moorilla/

Tuesday, June 15, 2010

The Daring Cooks, June: Pâté and Bread

Our hostesses this month, Evelyne of Cheap Ethnic Eatz, and Valerie of The Chocolate Bunny, chose delicious pate with freshly baked bread as their June Daring Cook’s challenge! They’ve provided us with 4 different pate recipes to choose from and are allowing us to go wild with our homemade bread choice. I chose to make a Three Spice Pork Liver Pâté, and I made some bagels to go with it.

Three Spice Pork Liver Pâté (Recipe modified a bit to make sizes easier for me (rounding up from pounds, increasing garlic/spice quantity because garlic and spices are good)

Yields one 25 by 12,5 cm (10 by 5 inch) terrine or loaf pan

Oven: 180 centigrade

500 grams pork liver
250 grams ground pork
250 grams pork fat (or pork belly)
3 cloves garlic
2 shallots
1 whole egg and 1 egg yolk
1 tsp cinnamon
1 tsp coriander (ground or crushed)
1 tsp cumin
1 tsp salt
1 tbps coarse freshly cracked peppercorns
30 ml cognac (brandy)
2 bay leaves
250gm bacon (long strips)

I got the butcher to grind the pork belly for me, as I don't have a food processor, so the making it smooth was going to be fun at the best of times (stick blender almost works, it turns out). Basic plan for the recipe is to blend/grind/slice all the meats with the garlic, shallots and spices until the whole thing is as smooth as you want it to be. From there, mix it through the cognac and eggs.


Line your tin with bacon, overlapping the sides (see photo). Put a bay leaf in the bottom. Spoon in the mixture and fold the bacon over the top, sealing in a second bay leaf. Put in a water bath in the oven and bake for an hour and a half. Let it cool in the pan so it reabsorbs the liquid. Chill before turning out.


 I made a second Pâté, a Red Lentil and Goats Cheese one, as I was attending a party where I knew there would be vegetarians. The recipe for this one is tremendously easy: 1 cup lentils cooked in 2 cups vege stock + bay leaves until soft and the liquid is absorbed, 125gm soft goats cheese mixed with 3 eggs. Combine the two, season with salt/pepper, bake until they come away from the sides. I used individual size (300mL capacity) dishes for these, and they cooked in an hour in a 180 centigrade oven, at the same time as the other Pâté. Next time I would maybe add some paprika to darken the final colour of the dish, but that isn't a major.


I also made Bagels, as my bread contribution. The bagel recipe is from Gray - The Destitute Gourmet:

(1) 1/4 cup warm water, 1 tsp sugar, 1 tbsp yeast (I used 2 sachets of the supermarket dry yeast)

(2) 4-5 cups plain flour, 1 tbsp salt, 1 1/2 tsp sugar, 1 1/4 cups water (I used 5 cups flour and needed a little more water, say 1 1/2 cups)

2 tbsp molasses, 1 egg (beaten). Toppings (sesame seeds and sea salt, for mine)

Combine ingredients in (1), set aside.

Put ingredients in (2) in a mixing bowl. When (1) is frothy, add to (2), mix until combined. Then turn out and knead for 8-10 minutes (original recipe says 5-8, more works for the consistency, I find).

Put dough in greased bowl, covered with greased gladwrap/clingfilm, leave to rise until doubled in size. Punch down, knead lightly, break into 12 pieces.

Make the pieces round, poke a hole in the centre, then shape into bagels. This process is hard to describe, so here is what I did (with apologies for the description). I poked my forefinger through the centre of the ball, then smoothed the whole. Linked thumb and forefinger, and turned the doughball slowly, contracting/releasing the thumb/forefinger loop until I had performed a full rotation of the bagel. I then put a second finger through, repeated the process.

An alternative method is to make the hole with your thumb, and shape the dough around your thumb, using your other hand, then remove dough from thumb, and compress to a bagel shape. This produces a smaller hole, but if done right, a smoother ring. (Thumb length/width may be a factor).


Boil a bot of water. Add the molasses. Drop the bagels in for 20seconds, then flip and leave for 20 more (they may sink at first, should rise fairly quickly). Remove, drop immediately in cold water, then put on a tray. I did this step in batches of three, so they didn't bump as they rose, pan size will determine how many you can do at once.

200c oven, put the bagels on a tray, bake for 7 minutes, remove, flip, brush new topside with egg and add topping, return to oven and bake for 13 more minutes. Then eat them. (Recipe has a complex process to avoid bagel flattening, I ignored it, seemed to turn out fine anyway. It involves the first 7 minutes being baked on a wet cloth, then flipping out onto the tray proper for the last 13).


The whole thing turned out pretty well, as you can see from the photo's.